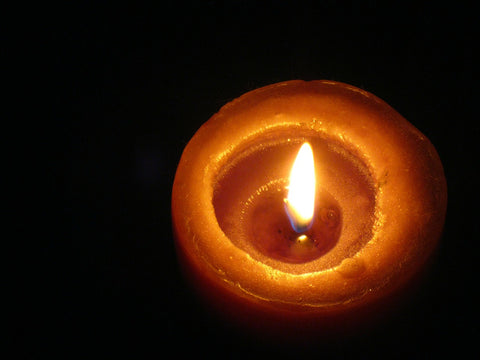
If you're not familiar with the term "tunneling," in relation to candles, it's when a candle burns a hole straight down its middle and the edges and sides are left unmelted.
Today, I'm going to talk about the reasons tunneling happens and what can be done about it.
Short of annoying, it can be very disappointing when you have a candle that's barely been used, but no fear. There's something we can do about those tunneling candles.
There are two reasons that a candle may tunnel.
The first reason would be that a candle is made improperly, and the second would be a result of not burning your candle in long enough increments.
In the case of a candle that is improperly made, it's usually a result of the size of the wick being too small for the diameter of the candle, that it's not multi wicked when it should be, or the wrong wick is used for type of wax used in making the candle.
If the wick is too small, a large enough flame isn't created, and that, my friends, is what you need to create a large enough wax pool to melt your candle to the edges. When you are burning a jar candle, pillar, or even a little votive, you want to see that wax melt into a significant pool that spreads to the sides of the candle.

Photo courtesy of House of Harris Gifts
The second reason that tunneling can occur is as a result from burning a candle for short periods of time with each burn.
First, consider the size of the candle you're burning. Then take into consideration the time you're burning the candle. Unfortunately, if you're only burning a candle for an 30 minutes to an hour before you put out the flame, you're not giving it enough time to establish that pool you need to get it to melt to the edges.
One of your larger candles, those with a diameter of four inches or more, are going to need more time (approximately two to three hours) to get that pool.
Short burns of one to two hours at a time will cause your candle to repeatedly heat in just the center of the candle with each burn, causing it to only burn straight down the middle.
Since the flame burns in the center, it starts to develop that pool with each ignition. Only, the wax begins to melt down through the center, then it melts off the walls. When the wax runs down the sides and fills up the hole, what happens?
You get a drowned wick, which is not able to be re-lit, and the candle is only able to be used as you would any leftover wax.
So now the question is...
How do you fix a tunneled candle?
Here are a few tricks to fix a tunneled candle, though it may take a bit of persistence that you may (or may not) feel worth it.
- take all of your wax that's taller than your wick area and simply remove it. This wax can be re-purposed and made good use of or tossed, if you don't care to get use of it.
- dig some wax away from the wick. This is because the wick has burned fiercely downward without the fuel (the wax pool) that keeps it burning at a steady pace, causing the wick to become stubby and too short to do its job properly.
- a better solution would be to turn your candle on its side and use a long lighter to reach down into the jar and carefully use the heat of the lighter to melt that wax that's around the wick and discard the wax that's running off the candle. Once you've done this, it's important to let the wax pool reach the edge before attempting to extinguish your flame.
Sometimes it may take a couple of times to get things flowing (or burning) properly. However, for those candles made with smaller wicks, it will take more effort because the candle won't get to the point where it will melt to the edges. Therefore, repeating these solutions will only result in a temporary fix.


4 comentarios
Hey Matthew! This information is for both pillar candles as well as jar/container candles.
It sounds like this is about pillar candles—what would cause this to happen with a regular sized taper candle?
good tip but that whiney high pitched voice on video would drive me nuts.
thanks for the tips!